
Build C++ project with CMake
Prequisites
- Install CMake 🔗
- Install Visual Studio 🔗 for Windows
- Needed for Microsoft C++ toolset, not the IDE. CMake will generate build scripts that uses
cl.execompiler.- Install Ninja 🔗
- Well, I said this is needed, but you can use
Visual Studio 17 2022for CMake Generator below.- Install Visual Studio Code 🔗
- Install C/C++ Extension Pack for VS Code 🔗. We can easily configure/generate CMake project.
What is CMake?
CMake is a tool to manage building of source code. Originally, CMake was designed as a generator for various dialects of
Makefile, today CMake generates modern buildsystems such asNinjaas well as project files for IDEs such as Visual Studio and Xcode.
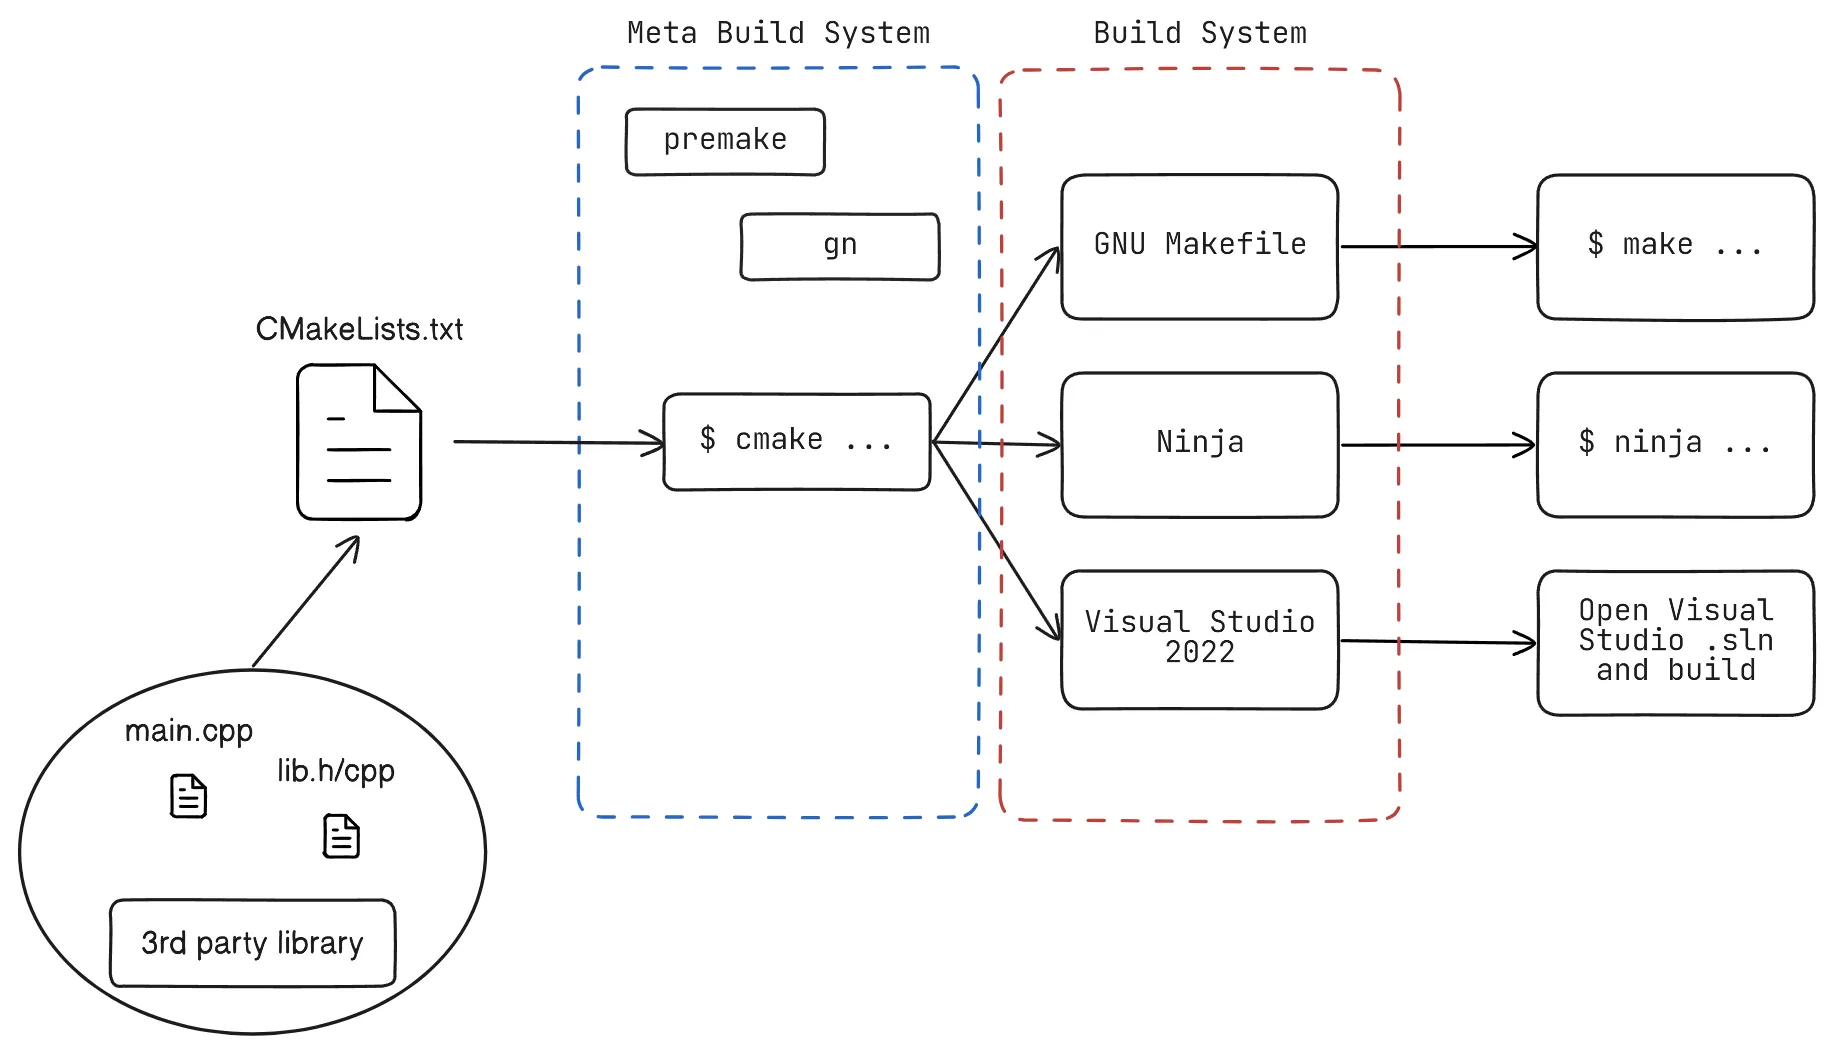
CMake will generate build scripts based on the project’s CMakeLists.txt and generator options(-G option for cmake CLI).
For example $ cmake -G "Visual Studio 17 2022" -Bbuild will create Visual Studio 2022 project inside build/ directory. Then all you need to build the actual executable is to run $ cmake --build build from project’s root directory.
Why use CMake?
Yeah, I know CMake is really weird and difficult when using it for the first time. For heavy projects, commercial grade IDE like Visual Studio is convenient and efficient. However for smaller toy projects, I am too lazy to boot up Visual Studio. Visual Studio Code feels much lighter, and even more customizable than Visual Studio.
Plus, you cannot use Visual Studio for C++ in Mac OSX envrionment, since their Visual Studio is mainly for developing .NET programs. Since university assumes every students are working with Windows environment, coding in C/C++ in Mac OSX without Visual Studio IDE was pretty difficult. Going through all of those obstacles helped me learn about build systems in C/C++ world.
Especially in my Computer Graphics class, professor used WIN32 API + (immediate mode) OpenGL for the class. He gave us Visual Studio projects for assignments and example codes. In order to try those sample codes in my MacBook, I HAD to learn about build systems. (Well, I used my Windows desktop at home for assignments tho lol)
These are some of problems I had.
- I have to include bunch of
.cpp/.hfiles into the compiler. - I have to link
GLFWlibrary since I can’t useWIN32 APIin Mac OSX, obviously. - Then I have to compile+link all these stuffs in order to run sample graphics program.
This is where CMake kicked in. I just needed to type in what source codes should I include in my program, what library should I link to, etc. Then a simple command would generate and build my program.
VS Code + CMake + MSVC
Make sure you have all the prequisites mentioned above.
1. 📁️ Open a new VS Code project
Create an empty folder and open Visual Studio Code from that directory.
1.5 ⚙️ Configure CMake Extension
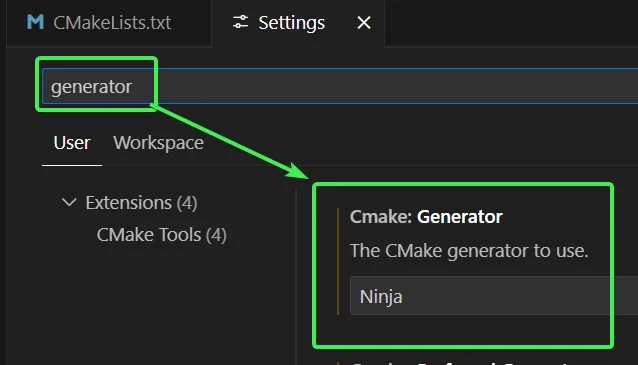
In VS Code settings, search generator and use Ninja for Cmake:Generator. We are going to generate Ninja build script for our C++ project. You can use other build systems if you want.
You can add this setting ("cmake.generator": "Ninja") to the local .vscode/settings.json configuration so that you can change it locally, instead globally.
2. 📄️ CMakeLists.txt and CMake configuration
Create a new file named CMakeLists.txt in current folder’s root. Then enter the following two lines.
cmake_minimum_required(VERSION 3.30)project("My First Project")cmake_minimum_required(...) sets the minimum required version of cmake for a project. If someone else is building this project, they are going to need at least minimum version of CMake specified here.
project(...) gives a name for the project.
According to cmake 3.30 - project(…) 🔗, you can specify more options inside
project().
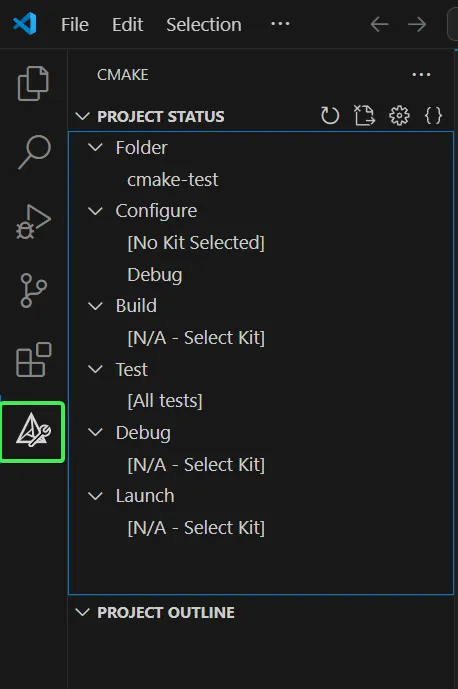
After creating CMakeLists.txt, check the sidebar. If you don’t see CMake extension icon, try closing VS Code and reopen it.
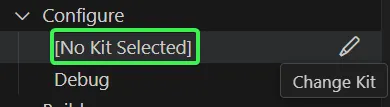
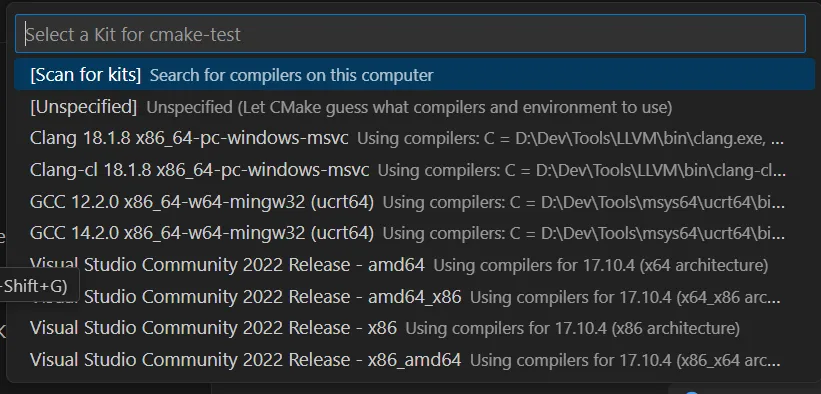
Clicking ✏ Icon next to Configure - [No Kit Selected] will show list of tookits in your pc. For me, I have gcc, clang, cl. We are going to choose Visual Studio Community 2022 Release - amd64. This one means we are going to build from: x64 PC - compile for: x64 PC.
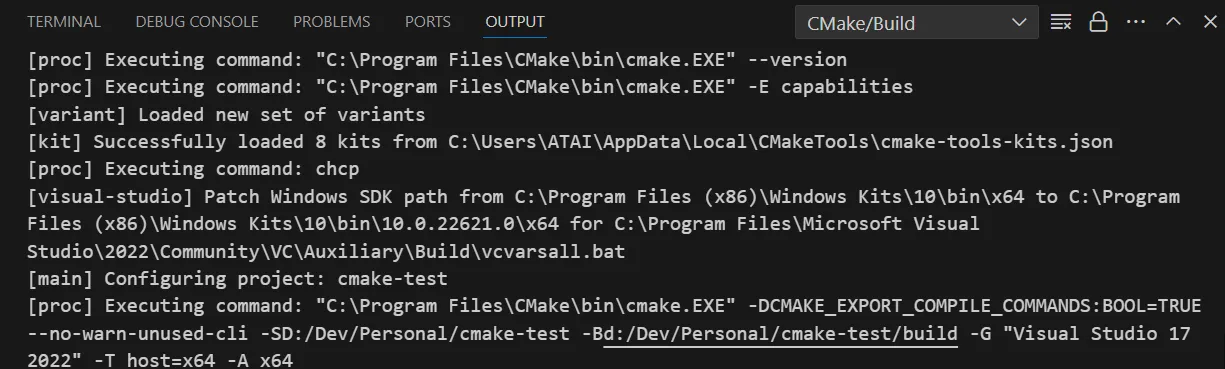
Configuration log will appear at Output window. By default, build scripts will be generated in build/ directory. You can configure this in VS Code’s CMake extension setting.
asdf
3. 📄Our main.cpp
#include <iostream>
int main(){    std::cout << "Hello World!" << std::endl;}
Now we can write our source code. Then we need to add main.cpp to our CMake project. Append a following line into your CMakeLists.txt
cmake_minimum_required(VERSION 3.30)project("My First Project")
# add ALL of the source codes needed to build our program.add_executable(main main.cpp)
add_executable(<executable_name> source_codes ...) adds executable to the project using specified source codes, this case main.cpp. Therefore our binary output file will be named main.exe.
When you hit save, VS Code will automatically re-configure the CMake project.
4. 🚀 Let’s build!
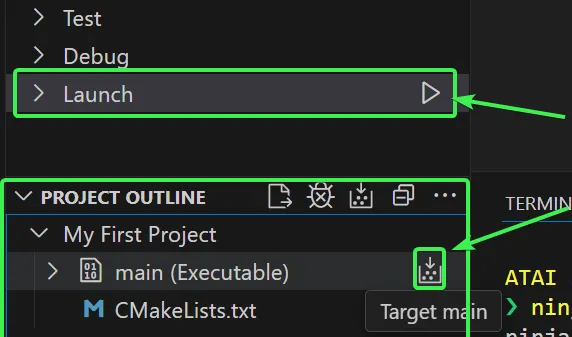
Then you can either launch or just build by pressing those buttons in CMake sidebar.
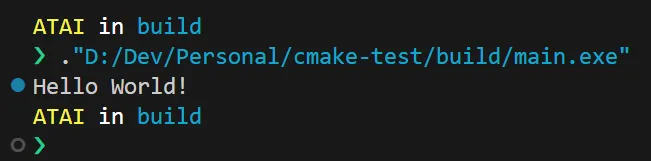
Inside build/ directory, our build output main.exe will be built. Then try running it. There you go! We have created our first CMake project!
Using commandline for building The command
cmake --build buildfrom project’s root will also build our project.
5. 😏Extra: VS Code Intellisense
If your Intellisense stops working, such as autocompletion being totally broken, check the configuration.
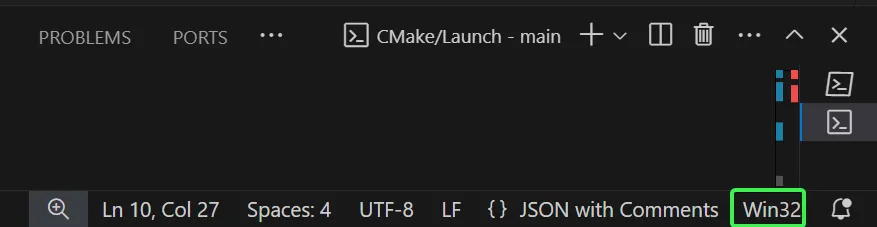
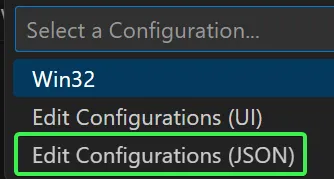
To configure Intellisense(Autocompletion), press Win32 button at the right bottom corner of VS Code. Then open JSON configuration. It will generate .vscode/c_cpp_properties.json in your project directory. Then you can configure intellisense settings here.
{ "configurations": [ { "name": "Win32", // ... "configurationProvider": "ms-vscode.cmake-tools" }, ], "version": 4,}Make sure you have "configurationProvider": "ms-vscode.cmake-tools" in the JSON file. This will enable more accurate Intellisense based on CMake project rather than default C/C++ Extension Intellisense.
Alternative: clangd
You can use clangd VS Code Extention 🔗 intellisense instead of C/C++ extension’s one. Although you need to install clangd. Check clangd installation 🔗.
After installing LLVM and clangd Extention, you will see bunch of warnings pop up.
{ // ... "C_Cpp.intelliSenseEngine": "disabled",}Disable C/C++ Extension’s IntelliSense engine from settings(UI) or add the following line to your local .vscode/settings.json
This will disable C/C++ extension’s intellisense in our workspace. When you don’t want to use clangd intellisense, disable the clangd extension and revert the configuration to "C_Cpp.intelliSenseEngine": "default".
cmake_minimum_required(VERSION 3.30)project("My First Project")
# >>> export build flags so that clangd knows about our project!set(CMAKE_EXPORT_COMPILE_COMMANDS 1)
# add ALL of the source codes needed to build our program.add_executable(main main.cpp)
Then in your project’s CMakeLists.txt, add set(CMAKE_EXPORT_COMPILE_COMMANDS 1). Now you are ready to use clangd as your main IntelliSense!
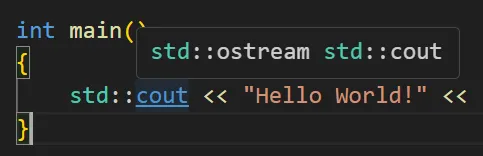
This is the default C/C++ extension’s IntelliSense, hovered onto cout object.
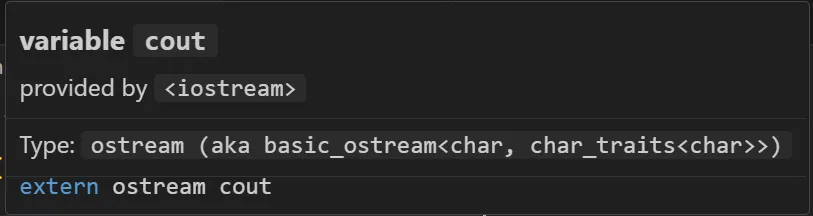
This is clangd IntelliSense, hovered onto the same cout object.